
Part 1. Some explanation of job.

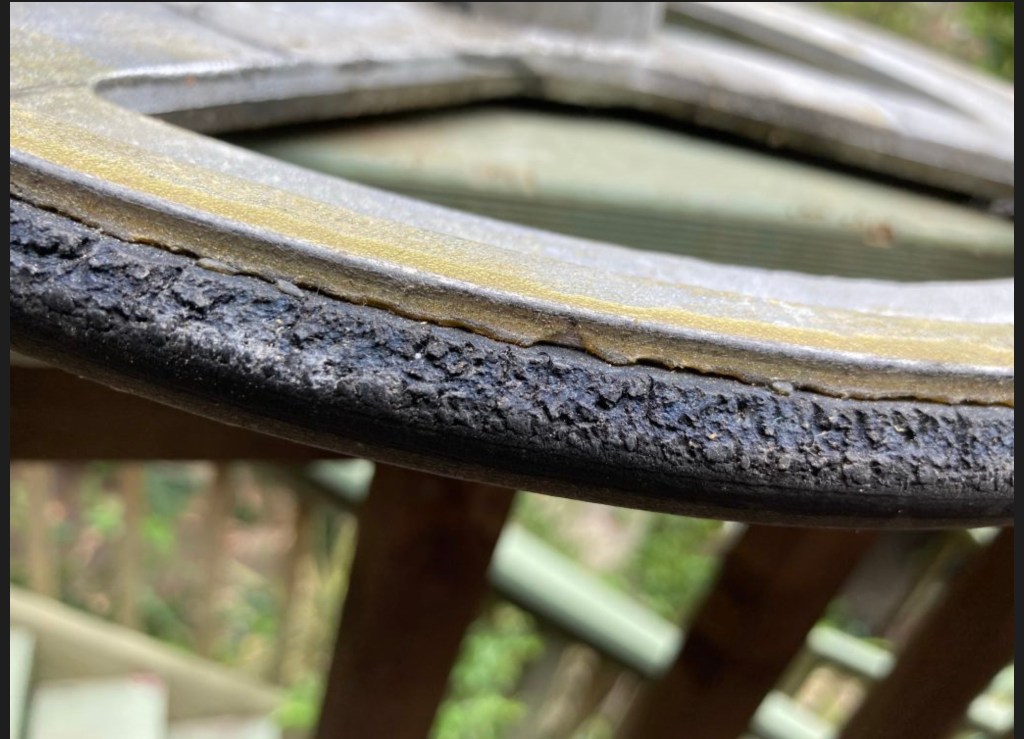
As the drive wheels age they will begin to develop small cracks across the surface. This will start 20-30 years down the track and will not be noticeable for quite some time after the cracks appear. If grommets are replaced as needed and the orientation of the aluminum cone on the drive wheel remains unchanged then any damage will remain minimal for a few years.
If you use the wheel without the grommets and/or the rubber boot on the motor, the point and sharp lower edge of the cone will start to rip the rubber ring apart fairly quickly. The is exasperated by the cracks already present in the rubber. Once this happens and big chunks are gouged out of the rubber and it is useless.
If you can get to the drive wheel before the gouging happens there is an easy way or repairing the cracks and giving the drive wheel several more years of life. I am not sure how long this fix will last but I have put some reconditioned drive wheels in a few customers wheels(free of charge) about 3 years ago and so far they have not come back with problems.
Part 2 Application of glue.
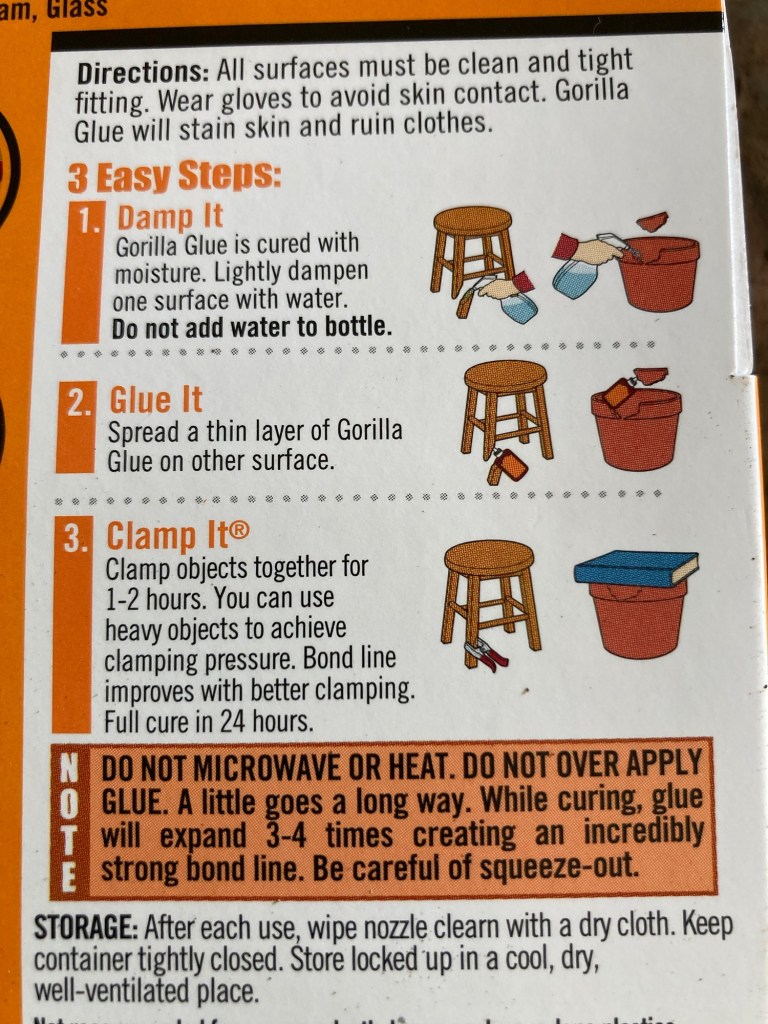
What is required is a bit of expanding polyurethane glue and a bit of plastic bag. The two brands I have used are Titebound and Gorilla. You need the type that foams up and expands. The aim is to get the glue down into the cracks as much as possible and then it expands and locks itself in place. There are a few health warnings with using this glue and work should be done in a well ventilated area and gloves should be worn. Be careful not to get the glue on your skin. Also when the finishing with sandpaper happens you should use a good dust mask.

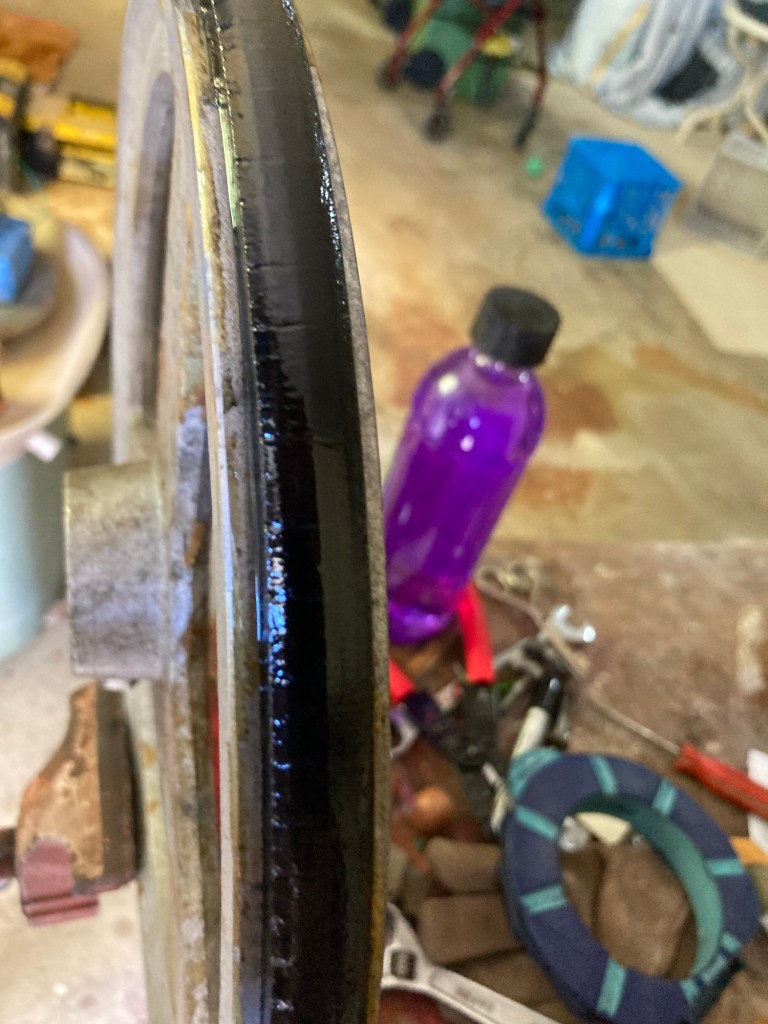
First the old drive wheel needs to be cleaned and as much gunk as possible removed from the cracks. I use a soft brass wire brush, , a metho wash then a wipe down with clean water. The rubber needs to be slightly damp for the glue to go off. I only do sections at a time, about one third and start by putting a little bead of glue aver the section I am doing. A little goes a long way with this stuff and as you need to sand off any access, be a bit stingy with it. See pic.

I then fold over the small piece of plastic and pull it around the rubber in the same way you might polish the rim of a bowl with a piece of chamois when you are throwing on the wheel. See little video below.


I now wait until the glue has set before continuing to the next section. Once the whole drive wheel has been done I leave it for at least a day before sanding.
Lately I have taken to using a hard resin hammer to flatten the glue on the surface of the rubber. I wait until it is no longer tacky but before it goes hard. Not to sure whether this has a positive effect, I just like banging things.

Part 3 finishing off and sanding.
I use a variety of implements to do this, a coarse diamond pad, coarse sand paper and finish off with 250# wet and dry paper. I idea is to remove the glue on surface with leaving the stuff in the cracks. If you don’t remove the surface glue layer the drive wheel will be too shiny and will slip against the cone when the wheel is being used.
If you do have a go at this please send me some feedback so I can get a sense of how it works for other people.


Leave a comment